Hey email designers, marketers, and geeks! We want you to be able to design the emails of your dreams with the BEE editor —and be able to send them with ease. That's why we recently rolled out our MailChimpandGmailconnectors.Next in our lineup is the BEE SendGrid connector. Let's check it out!
Why use SendGrid and BEE Pro together?
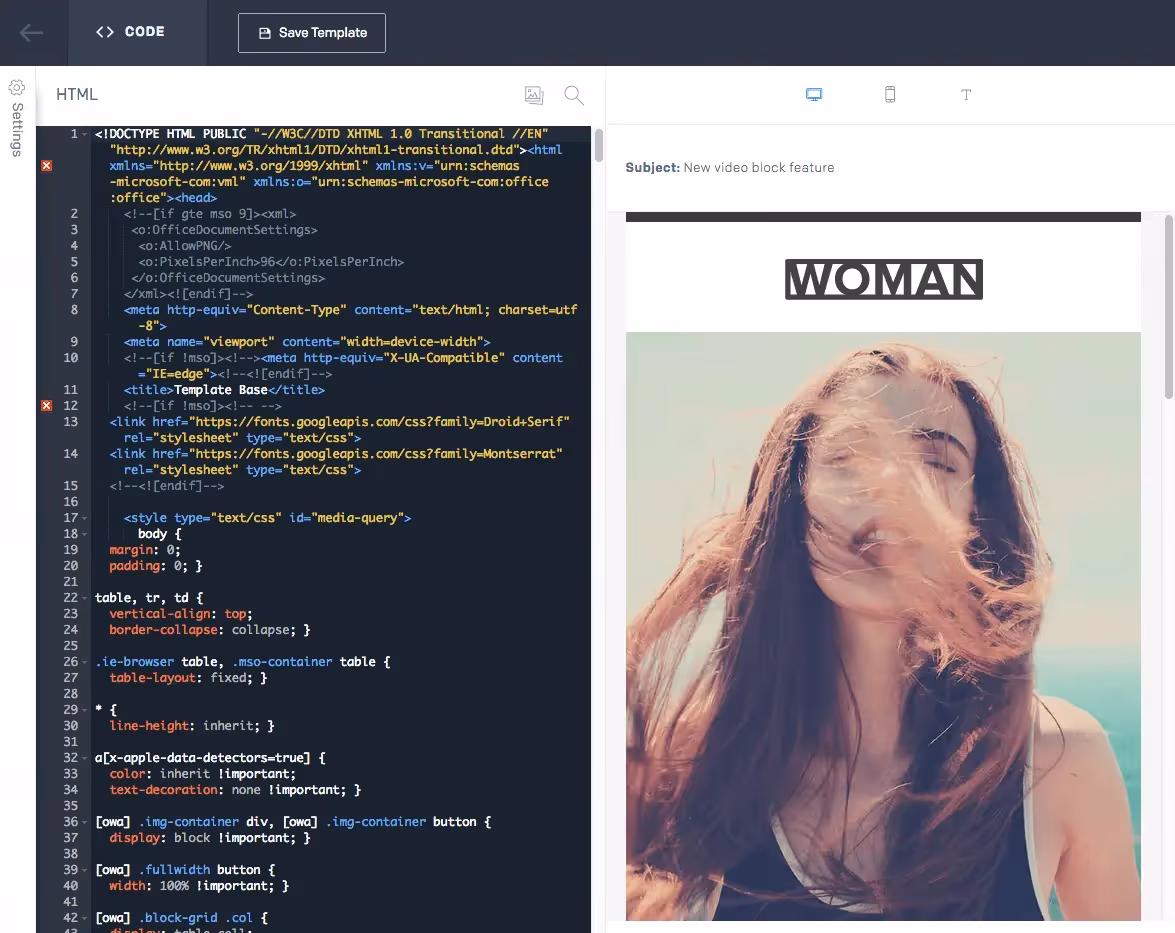
Like MailChimp and Gmail, SendGrid is a solid option and popular choice when it comes to sending email. And, many SendGrid users also use the BEE editor in the BEE Pro platform. Why?Folks who use BEE Pro recognize it as a dynamic, powerful design tool.The BEE drag-and-drop editor makes for easy email layouts, and granular control on padding, spacing, buttons, and borders allows you to make design adjustments with more precision. You can also design and save templates, tap into multiple free stock photo libraries, and have each email be mobile responsive. BEE makes it fast to build an email that looksjust the way you want it to.So, SendGrid users, welcome to the fam. Here's how to activate the SendGrid connector in your BEE Pro account.
Step-by-Step Guide: Exporting your emails to SendGrid
Step 1: Get an API key from SendGrid
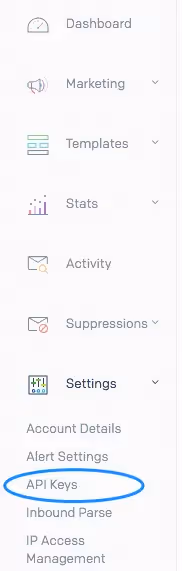
To get started, head on over to SendGrid.com and log in to your account.On the lefthand side, click the Settings menu. Tap "API Keys."
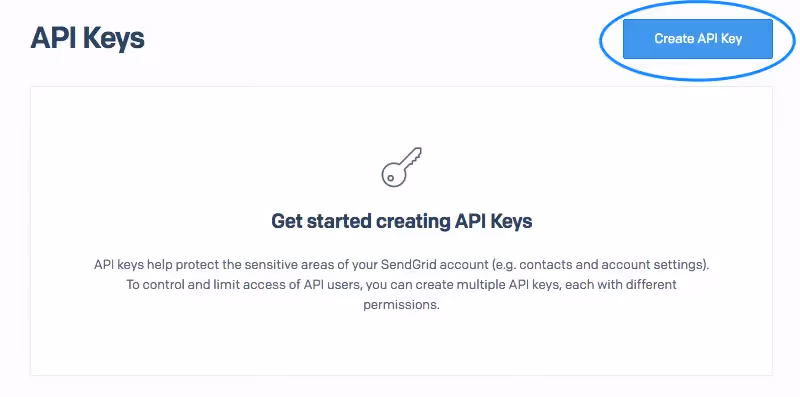
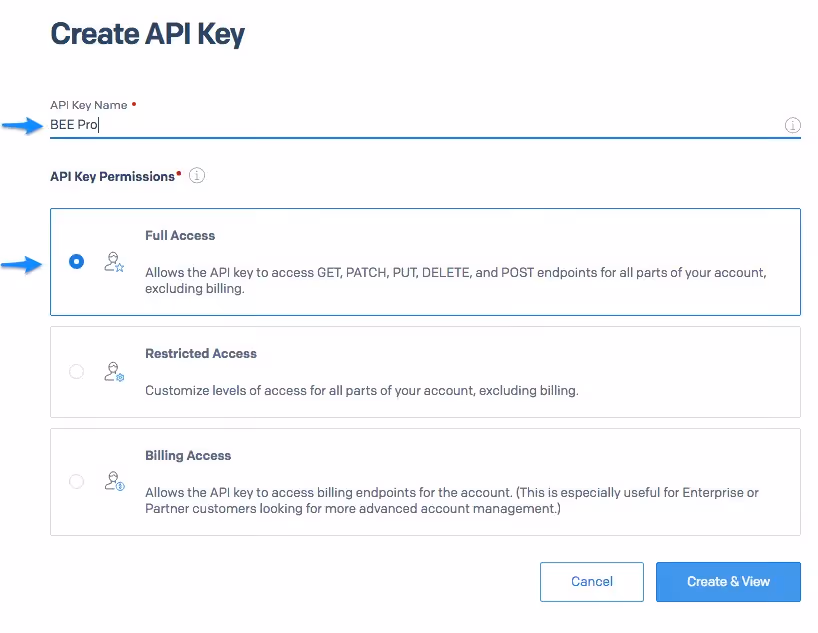
In the window that appears, tap the blue Create API Key button in the upper right corner.
Enter a name for thekey in the type form at the top.Be sure to select the Full Access API option. Then click Create & View.
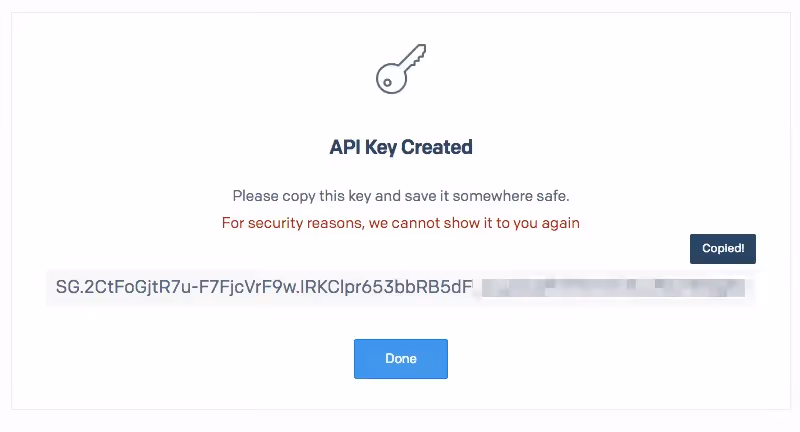
On the following screen, you'll see your API key. Copy it. Then tap Done.
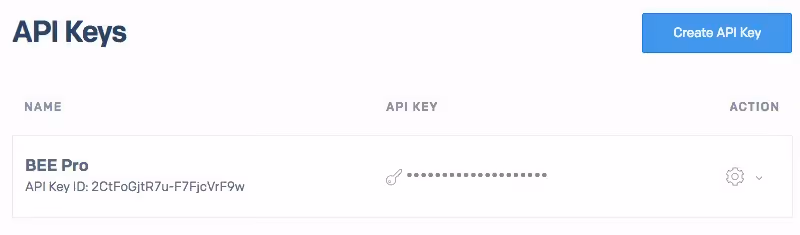
Your API key will now appear in the API Key menu.
Step 2: Activate the SendGrid connector in BEE Pro
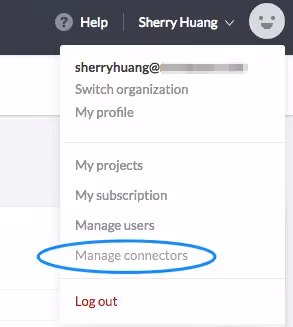
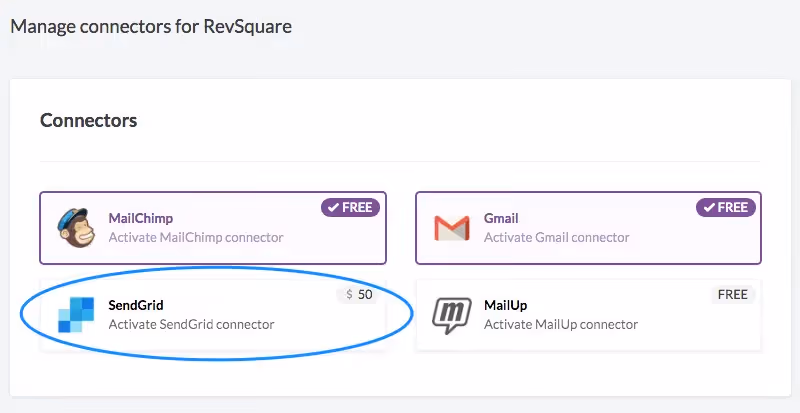
Login to your BEE Pro account. From the menu under your account name in the upper right corner, choose Manage connectors.
To connect SendGrid, go ahead and click on it. SendGrid is a paid connector for $50 per month.
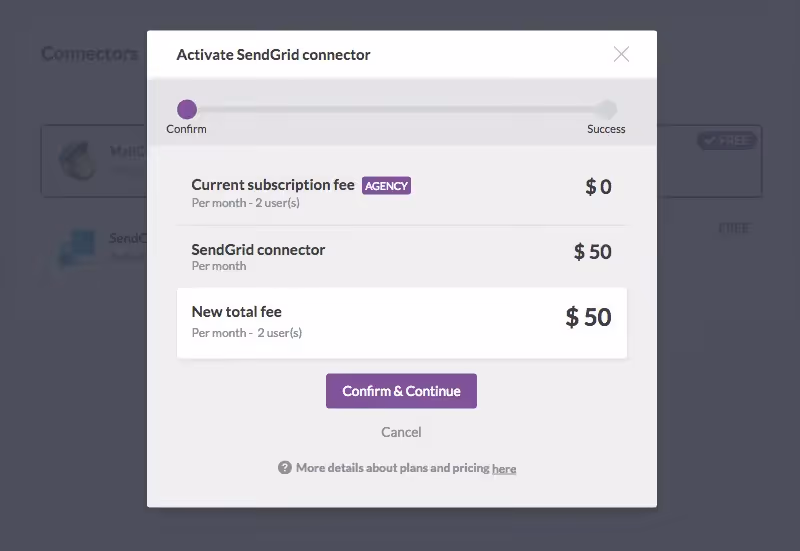
Confirm the connection on the pop-up window and you're all set!
Finally, add your API key. On your Projects homepage, navigate to your Settings menu.
Note for BEE Pro Agency users
If you have a BEE Pro Agency account, you can connect different SendGrid accounts to different Brands (i.e. you have different clients with different SendGrid accounts). You need to select a Brand in which to install and connect SendGrid— i.e., you will not see theSettings tab if you haveAll brands selected in the left-side drop-down menu.
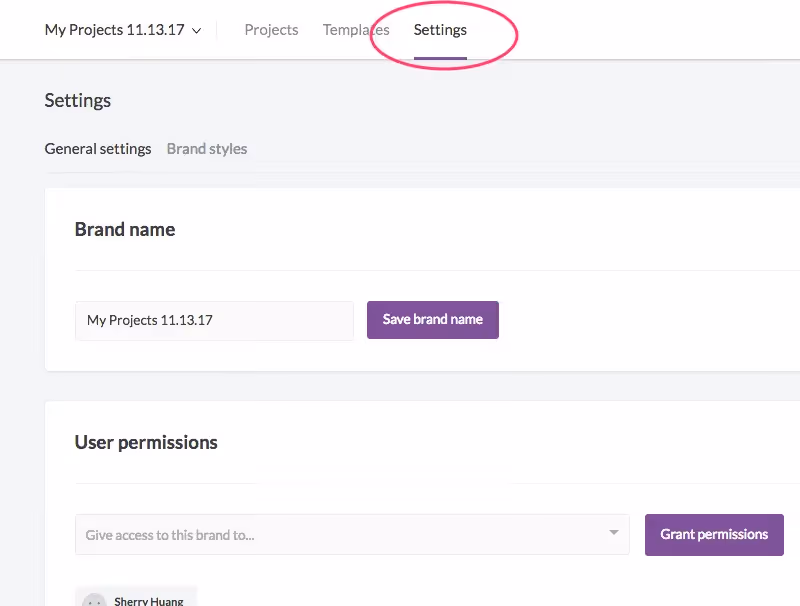
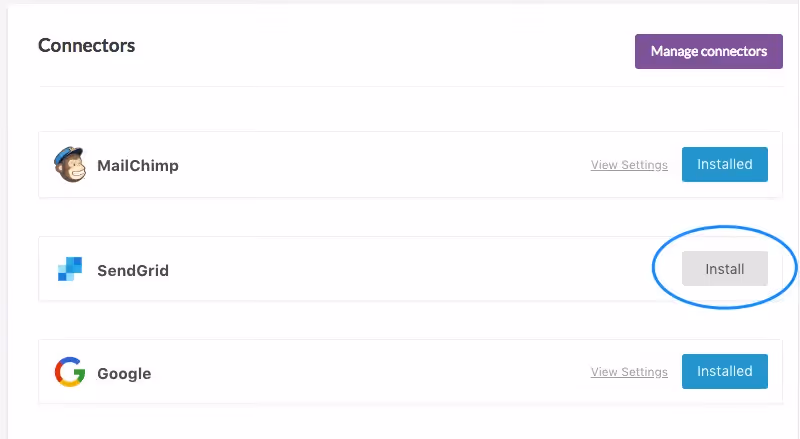
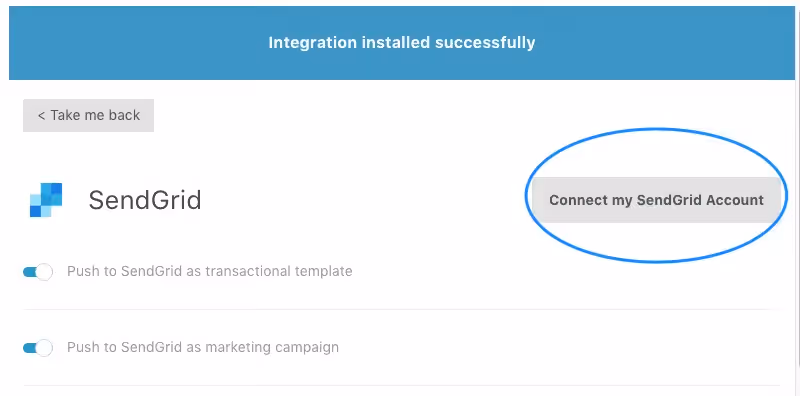
Under Settings, scroll down to the Connectors section. Tap "Install" for SendGrid.
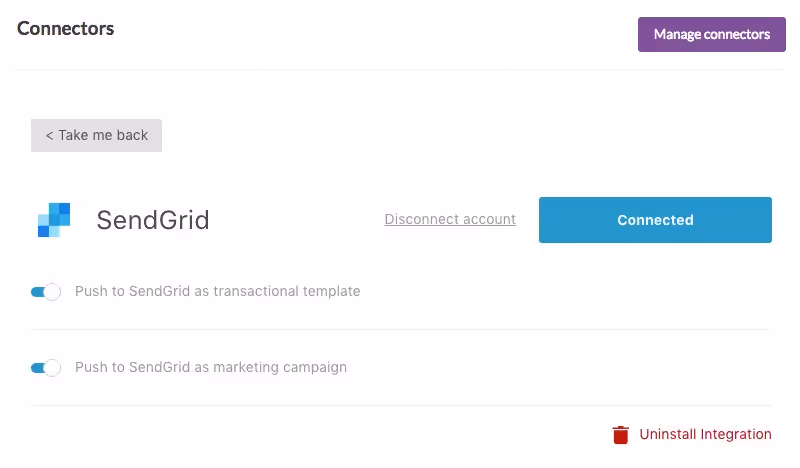
Check off one or bothtransactional and marketing campaign types. Click Connect my SendGrid account.
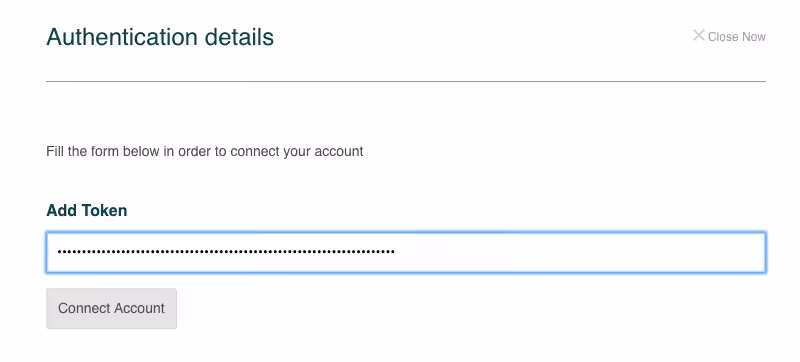
Paste in that API Key from SendGrid and click Connect Account.
You're now connected!
Step 3: Export your email
Now that BEE Pro can communicate with your SendGrid account, you can export any email design. Here’s how.Navigate to yourProjects menu,view the list of messages within any project, and click the email you’d like to push to SendGrid. Use the drop-down menu to choose Export.
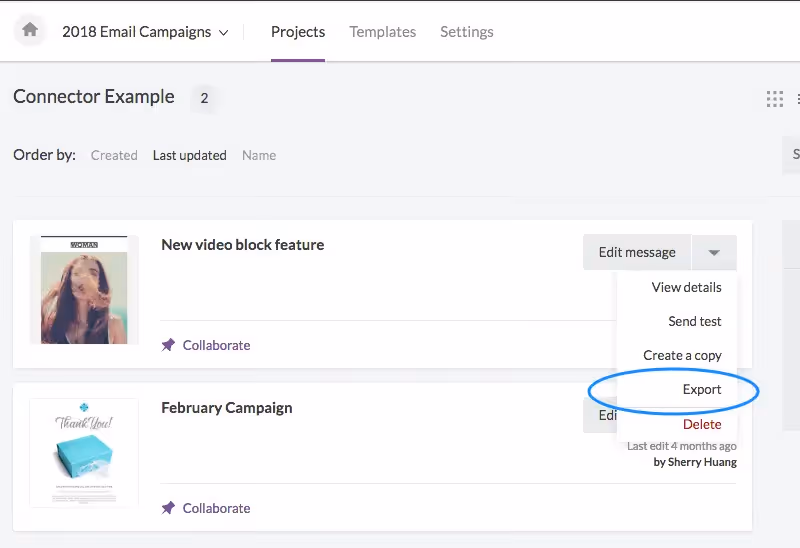
Click Export to ESP.
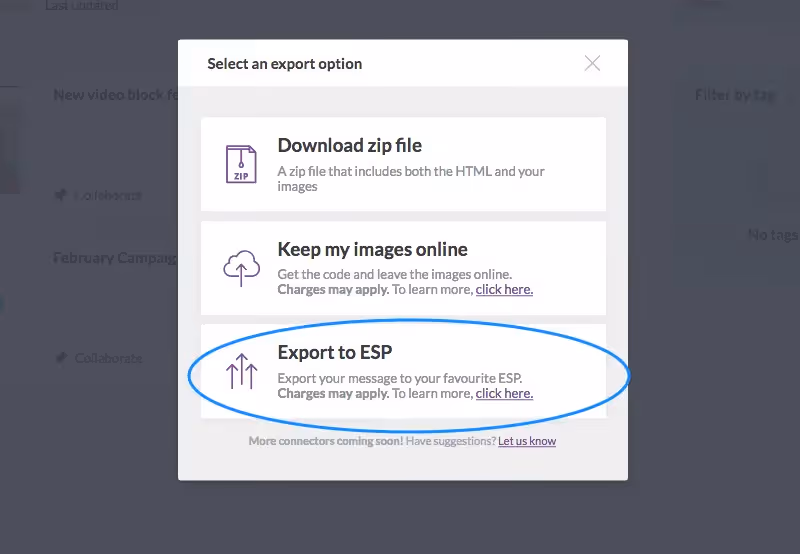
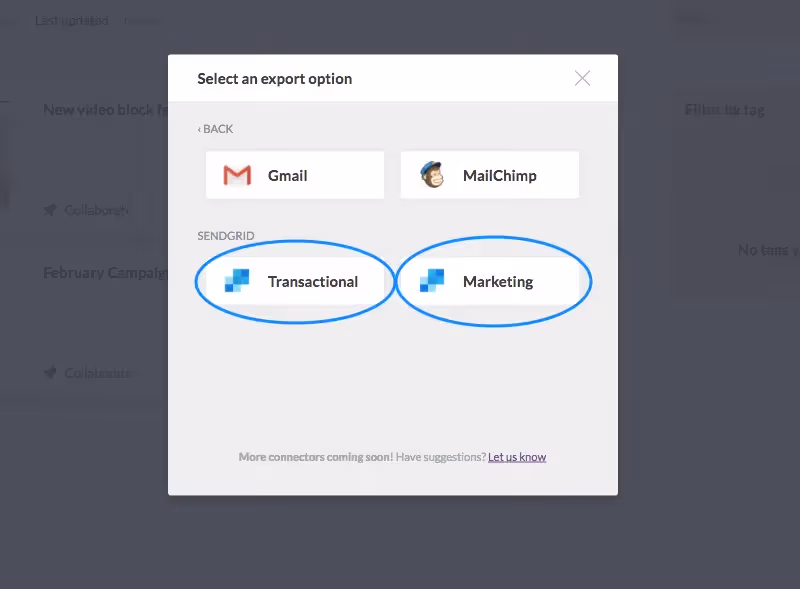
Select to export to your Transactional or Marketing campaigns:
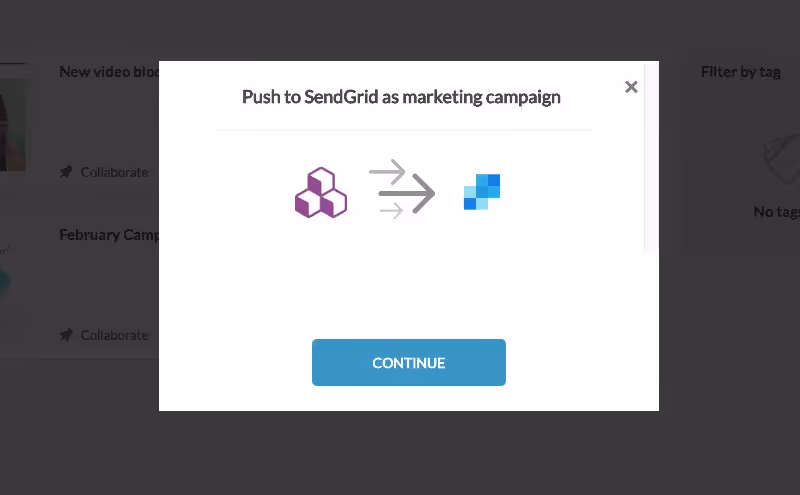
Then, confirm the push by clicking Continue.
Step 4: Access your email in SendGrid and send!
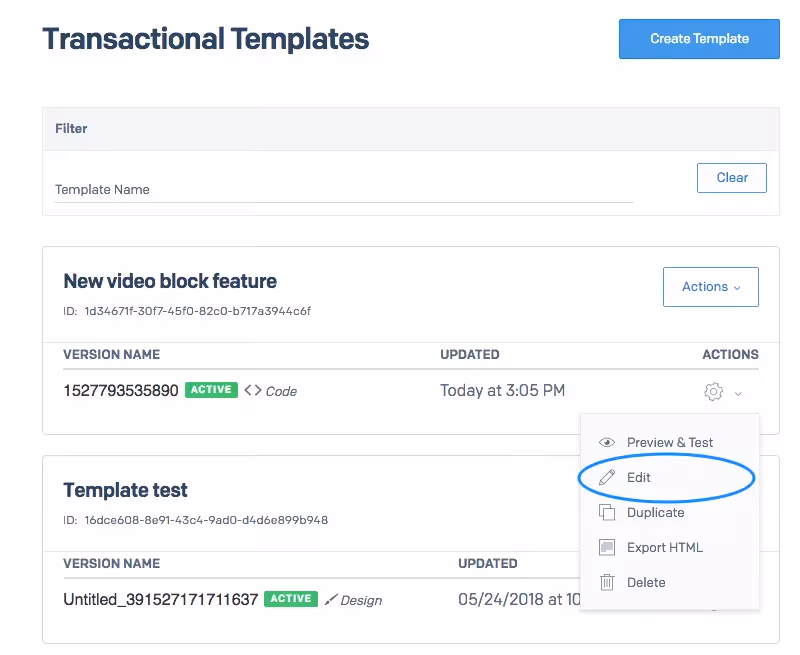
Looking for your email?
- If you selected SendGrid Transactional, the message will appear under Templates > Transactional.
- If you selected SendGrid Marketing, the message will appear under Marketing > Campaigns.
If you want to make any adjustments, just use the drop-down menu to edit and review your message.
Then, do what you gotta do, and send!
Go Pro and send any BEE email with SendGrid!
If you’re not using BEE, sign-up for aBEE Pro free trialto check it out and enjoy the new SendGrid connector.